Showing posts with label DT Mitsyana. Show all posts

Tuesday, January 25, 2022

Dreaming of Spring

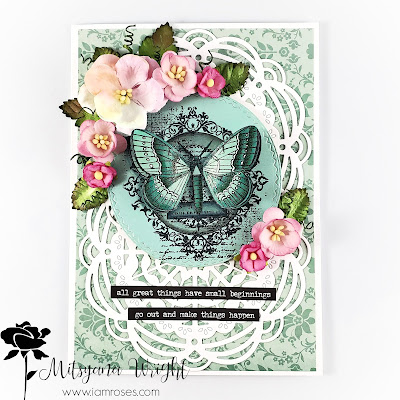
Hello Friends! Design Team Member Mitsyana here! And I'm sharing with you another project using gorgeous I Am Roses flowers.

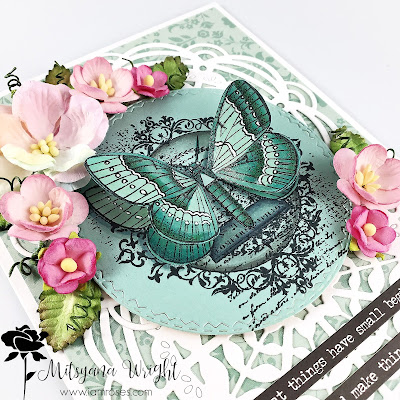
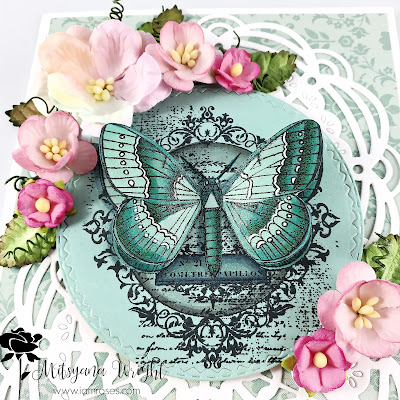
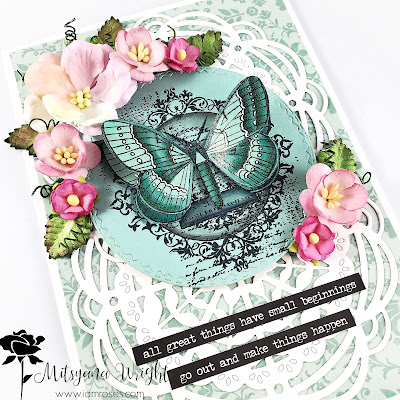
Spring isn't going to be popping in anytime soon but that doesn't mean we can't dream of it. Here I created a darling butterfly card adorned with beautiful IAR blossoms...


I Am Roses Products Used


Other Products Used
Big Shot (Sizzix)
Eileen Hull Heart Mandala Die (Sizzix)
Tim Holtz  Stitched Circles (Sizzix)
Creative Station(Xyron)
Tim Holtz Ideaology Small Talk Stickers (Advantus)
Butterfly Flourish Stamp (Deep Red)
Tuxedo Black Ink (Momento)
Alcohol Markers- Teal Dark, Peacock Medium, Peacock Light (Diamond Press)
110 lb White Cardstock
Coral Couture Stack (DCWV)

I hope today's project filled you with cozy springtime dreams and inspired you to create something beautiful!

Thank you so much for stopping in!!

~Mitsyana Wright


Wednesday, April 21, 2021

Life is Yummy- Slimline Card

Hello, Crafty Friends!
I have a "yummy" card to share with you all today! What makes this card so yummy you ask?!
Why these I Am Roses' delicious May Roses in Dyed Candy of course!!


If you loved the Unicorn Dyed Flowers, you are going to eat up these brighter bolder versions of them!!
It's like a CANDY-coated RAINBOW!! And very much lives up to its given name!

For today's card, I paired my gorgeously delicious Dyed Candy May Roses with 


And kept the yummy theme going with these adorably fun 3D ice cream embellishments.

This slimline card turned out so incredibly sweet!!

I hope you love it as much as I do!

Thanks for stopping by!!

~Mitsyana


I Am Roses Products Used

Other Products Used
Eileen Hull Mandala Die (Sizzix)
120lb White Cardstock (Accent)
3D Embellishments (Momento)
Craft Foam
QuikGrip (Beacon)


Wednesday, March 17, 2021

A Very HAPPY Birthday Card

Hey Friends, Design Team, Member Mitsyana Wright, here. And I have a very HAPPY Birthday card for you all today. What makes this card extra HAPPY?? Why it's all the wonderful (and HAPPY) colors, of course!!

I adorned today's card in RAINBOW of colors. All of which came from I Am Roses' pack of Mixed Rainbow Color Cherry Blossoms. There are 10 colors and 5 blooms of each color that come included in each pack. It's definitely a great way to get a large variety of colors for a fraction of the cost.

If you love all things rainbow like I do, you'll definitely love these...


The Cherry Blossoms may be on the smaller size but still give a big "wow" factor. 


They look great combined with other flowers but also can stand boldly by themselves.


For today's card, I simply paired my Cherry Blossoms  with I Am Roses' Tiny Green Leaves to complete the look. So simple and absolutely gorgeous!


I hope you enjoyed my inspirational card for today and hope you stop by again soon!

I Am Roses Supplies Used

Other Supplies Used
Rainbow Diagonal Striped Paper / Happy Birthday Sentiment (Kingston Crafts)
Gold Foil Paper (DCWV)
110 lb White Cardstock 
Scalloped Oval Die (Diamond Press)
Big Shot (Sizzix)
Creative Station Lite (Xyron)
Mega Runner (Xyron)
 Princess Anya Stamp (Greeting Farm)
Crackle Stencil (Little Birdie)
Clean Color Real Brush Markers (Zig/ Kuretake)
Versafine Onyx Black Ink (Tsukineko)
Distress Oxide Inks- Picked Raspberry, Mustard Seed, Lucky Clover, 
Mermaid Lagoon, Wilted Violet  (Ranger)
Clear Drying Liquid Glue
Foam Tape
Scissors

Happy Crafting!!
~DT Mitsyana


Tuesday, November 10, 2020

Hello Friend


Hello, my creative friends! 
Design Team Member, Mitsyana Wright, here to share with you more I Am Roses inspiration. 

Today, I'm sharing this slimline card. This is a great every day/ just-because card. Now, more than ever, I feel that it is important to let your friends and loved ones know that they are being thought of. During this prolonged time of isolation, a simple act of sending a handmade card can do so much for one's emotional well-being.


Slimline cards are very on-trend. The sleek elongated design catches the eye and is a lot more alluring than the everyday standard A2 sized card.

Combining I Am Roses Flowers to the attractive size of any slimline card will almost always result in something stunning that is sure to drop the jaws of its recipient!

Receiving this in the mail is like receiving a bouquet of flowers... except these won't wilt or die! This means that your friends and family will be able to enjoy them much longer!!

Supplies Used 

I Am Roses Products 

Other Products
Jen Long Ornate Oval Frame (Sizzix)
David Tutera Eucalyptus Leaves (Sizzix)
Pam Bray Sensations Paper (Wild Whisper)
110 lb White Cardstock (Recollections)
Mega Runner (Xyron)

I hope you enjoyed today's little bit of inspiration!

Thank you so much for stopping by!


See you next time!
~Mitsyana Wright


Saturday, October 10, 2020

Give Thanks

Hey, Friends!! 
Design Team Member Mitsyana Wright, here and it is my turn on the I Am Roses Blog! Today, I have a Fall themed slimline card that is the perfect gratitude card.


For this card I used Lots of beautiful I Am Roses Flowers. A large Brown Romantica Rose, Three Dark Brown 2 Layer Full Bloom Flowers, Three Orange Carnations, Three Yellow Mini Round Roses, Two Cream Small Round Roses, and a single Yellow Spring Cottage Flower


I used 110 lb plain white cardstock for my card base and used papers from Authentique's Splendor Collection to layer- Splendor Four (brown plaid) and Splendor Six(leaves background) and sentiment from the Splendor Elements sheet.


I die cut leaves from kraft cardstock and a lace border from fabric cork and adhered them both onto my card before attaching my flowers.


I love how gorgeous these brown and oranges look against each other! 

I Am Roses flowers always take my projects to a new level of stunning each and every time!! I really can't get enough!

I hope you enjoyed my project for today! Be sure to come and visit us again!!

~DT Mitsyana


I Am Roses Product Used

Other Products Used
Diamond Press Lace Border Die
Diamond Press Foliage Die
110 lb White Cardstock
110 lb Kraft cardstock
Bellagio Natural/ Gold Cork Fabric
Liquid Glue


Tuesday, April 28, 2020

Sending a Little Sunshine Your Way

Hey there, Crafty Friends! Design Team member Mitsyana, here!! 
And today I have an adorable card that is sure to brighten someone's day!

With all that is happening in the world right now, I figured sending out some handmade cheer to friends would help lift their spirits.


I Am Roses Supplies Used

Other Supplies Used
Honey Dear Stack (DCWV)
140 lb Mixed Media Paper (Strathmore)
110 lb White Cardstock (Accent)
Tim Holtz Stitched Circle Dies (Sizzix)
Large Lace Border Die (Diamond Press)
Sunflower Lula Stamp (Swiss Pixies- CCDesigns)
Versafine Onyx Black (Tsukineko/ Imagine Crafts)
Clean Color Real Brush Markers (Kuretake/ Zig)
Inktense Pencils (Derwent)
Twine
Button

I love this color combo of yellows and grays. Gray on its own, seems dark and gloomy. But since it is on the cool color spectrum it has the ability to brighten as well. 


I stuck with the Yellow and gray color theme throughout...


And these Medium Daisy Flowers already come pre-assorted in a few spring colors that work very well together. And what do you know, a bundle of gray is thrown into this mix...


I Am Roses' Daisies continue to be a favorite of mine and go perfectly with these wonderfully dimensional Spring Cottage Flowers.

I arranged the flowers to resemble a wreath around the framed circle and then tucked bundled stamens under them to act as a filler instead of adding leaves.

I really love how cheery this card turned out! 


I hope this card will bring sunshine to someone's day! But until then, I hope it brought sunshine to yours!!

Thanks so much for stopping by!

Mitsyana Wright

Saturday, March 28, 2020

Smile Big


Hey, Friends!! Design Team Member Mitsyana here and I'm back on the I AM Roses Blog to share with you a sweet card to give BIG SMILES to whoever receives it.

Winter is gone and here in Mid-Texas, we are starting to see the local wildflowers starting to take bloom. I live in a rural area, far from the city, so when the flowers bloom we have rolling hills and fields full of flowers just painting the countryside. It's absolutely beautiful! Sometimes I want to share that beauty with friends but sadly fresh flowers have a tendency to wilt and die. Thankfully I Am Roses flowers never do! 

So today, I'm sending out some 'mailable' springtime cheer. With recent events looking a bit grim I think that the world could use a whole lot more sprinkled here and there.


Today, I'm using IAR's 


One of the reasons I love I Am Roses flowers so much is the amazing detail that goes into each flower. The colors, the dimension, the texture, and meticulous detail is absolutely stunning!! 


Take a closer look at these below...


The quality of these flowers never ceases to amaze me. And it is that attention to detail that has me completely addicted and wanting more.


They make my card making so effortless and turn my simple cards into stunning works of art!!


These gardenias and curly flowers are absolutely GORGEOUS!! If these don't bring a smile to your face I don't know what will!

I hope you love these paper beauties as much as I do and are inspired to sprinkle happiness and share a smile or two!

Thanks for stopping by!
~Mitsyana

Friday, February 28, 2020

Unicorn Roses? Yes, Please!!

Hello, Friends!! 
Design Team Member, Mitsyana Wright, here from Up On Tippy Toes and it's my turn on the I Am Roses Blog. And I have a fun and colorful card for you all today.


This card was inspired by their very own gorgeous UNICORN colored roses!!


One look at these and I knew I had to create something bright, colorful, and uplifting!

Just look at them, how can they not make you HAPPY and smile from ear to ear?!

For today's project, I used the following...

I Am Roses Products


It's pretty darn obvious that unicorns go hand in hand with rainbows... so I knew I had to incorporate that rainbow-colored them throughout the card.


And what goes hand in hand with Unicorns and Rainbows?? Why, dreams, of course!!
This older Tim Holtz stamp I found went absolutely perfectly with the whole unicorn and rainbows vibe...


I hope this project has inspired you today and that you go and create something colorful!!

Thanks for stopping by!
~Mitsyana


Tuesday, January 28, 2020

A Vintage Spring


Hello, Friends!! 
Design Team Member Mitsyana here with a gorgeous card for you. Here in Texas,
we still have mildly cool weather with lots of rain. Hopefully, that means flowers will follow. We haven't had a very cold winter so maybe an early Spring is just around the bend. And with Spring quickly approaching it inspired me to create this beautiful Vintage Spring Card!


For the focal point, I created a vertical swag using I Am Roses' White w/ Pink Edge Variegated Romantica Roses and Pink Curly Roses.

I paired Small Green Leaves together and tucked them under the Pink Curly Roses. I repeated this on both sides and then added an extra leaf to each end.

Then, I nestled delicate White Cottage Flowers throughout.


The results are simple but elegant! I can't wait for the real flowers to start popping up! I can only hope they are as beautiful as these!!

I hoped you enjoyed my card for today! 

For the detailed list of supplies used and a full tutorial, please visit with me on my personal blog... HERE.

HAPPY CRAFTING!
Mitsyana

Tuesday, December 10, 2019

Making Spirits Bright

Hey, Crafty Friends! Mitsyana Wright here, and I'm back with another simply adorable holiday card to share with you all!

Christmas is just a couple weeks away! And it's not too late to get your crafty self into cardmaking gear. Sometimes with all the hustle and bustle, we find ourselves too busy to make elaborate Christmas cards... so why not opt for something more simple? Take colored images, pair it with gorgeous paper flowers, add a few tiny embellishments sprinkled in, and... tah-dah a super easy, super quick, and so super cute!!


I Am Roses Products Used

Other Supplies Used
Crossover II (Crafter's Edge)
Beary Christmas Stamp Set (Maker's Movement)
Beary Christmas Die Set (Maker's Movement)
Cardstock- Red, Black, White (Recollections)
Patterned Paper (Pink and Main)
Sprinkletz- Very Cherry (Buttons Galore)
Button Fusion- Red Carpet (Button Galore)

VersaFine Onyx Black Ink (Tsukineko/ Imagine Crafts)
MISTI (My Sweet Petunia)
White Gel Pen (Sakura)
Micron Pen (Sakura)
140 lb Mixed Media Paper 
Watercolor Pencils (Derwent Academy)
Water Soluble Markers (Derwent Academy)
White Gel Pen (Sakura)

Black Twine
Heidi Swapp Marquee Love Chunky Glitter


Today, I wanted to make a bigger more substantial card and if you're an avid I Am Roses fan, then you know why! Many of their wonderful flowers are quite large. And placing too many large flowers onto a standard A2 (4.25" x 5.5"-folded) card just will not do. Anything else you attempt to put on such a small space would feel crowded. So a bigger surface area is always great to accommodate larger items.

I started by creating a 6"x 6" card base from red cardstock. which I layered with a 6"x6" piece of black cardstock and 5 7/8" x 5 7/8" piece of white cardstock.

Then, I took a 5 3/4" x 5 3/4" piece of houndstooth patterned paper and die cut a circle window from the center. Then I adhered all the layers together and stamped my sentiment across the bottom of the window and set it aside to dry.


This was by far the hardest and most lengthy process of the whole card... coloring the images! LOL
Seriously though, it was! Then I die-cut the images out and added tiny details onto their scarves and presents using a white gel and black micron pen.

Time to add some POP to my card...

I ran a few leaves through my Xyron X Sticker Maker, then laid down a leafy base onto my card front.


Once I laid down my leaves, I added my bears to give myself an adequate amount of space for flower placement.

Then, I added my Red Gardenias and White Tea Roses, always starting with the biggest flowers first. Once glued down, I added a little collage medium into my flowers then dusted them chunky glitter.

Finally, I added my sprinkled bits of candy shaped embellishments and tied on a twine bow...


And here is my finished card...


I hope you enjoyed this easy card tutorial!

Until next time...
Happy Crafting!!

~Mitsyana Wright